Powerful low distortion 6P43P Balanced amplifier
- bob6542
- Dec 13, 2024
- 8 min read
Updated: Jan 7, 2025
This design started as a experiment in what could be done with a box of 6P43P.
At the start I had little except very basic published data on this 9 pin miniature pentode with no curves of any kind. It was a bit of a mystery tube but they were cheep so why not give them a try.
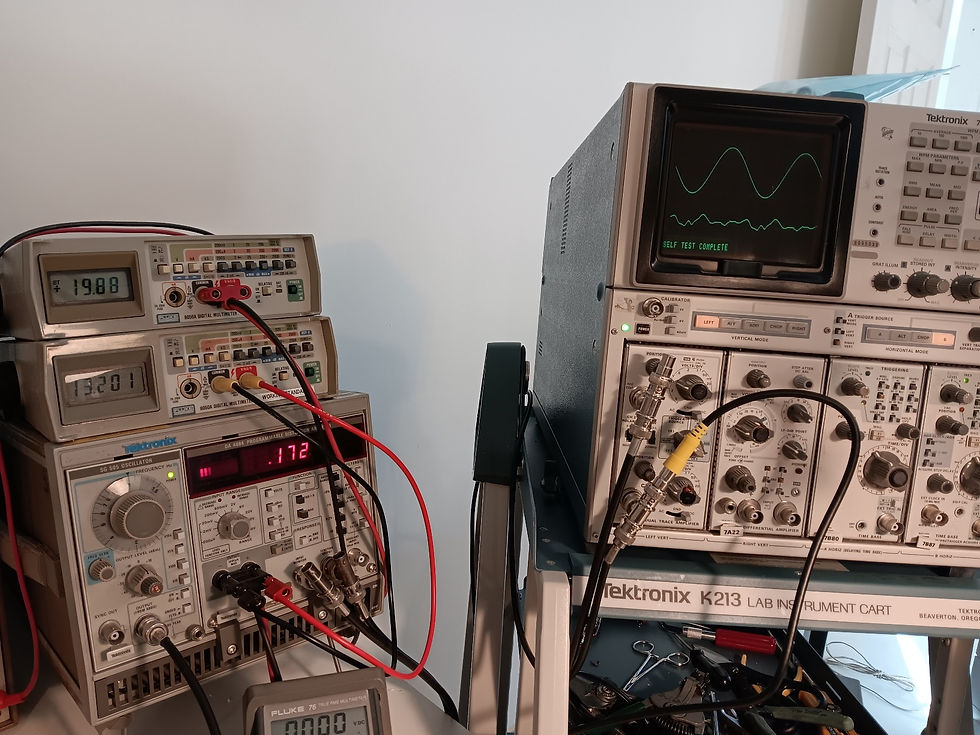
I started by running some plate curves on my utracer3.
The results suggested this little tube could pump out some serious current with my uTracer registering with Va=75.91V, Vs=247.1V, Vg1=-12V resulted in Ia=140.72mA.
This suggested a 6P43P pentode should have little trouble passing by in power the all to familiar 6BQ5.
The data sheet suggested max Va=300V and Vs=250V.
I have found that a little push of the Russian data sheet values still results in reliable operation if the screen and bias voltages are well regulated and stable in value so I thought to start with Va=330V and Vs=250V and run in pentode mode.
From my utracer3 data the curves did not look perfect yet were pretty good in terms of unwanted kinks at lower voltages and currents.

I set about making up a spice model using Ronald's WEB site's ExtractModel tools.
This did not go well at first with a few spice models that did not match measured curves.
When I am creating spice models I set up a spice simulation under the same conditions as the utracer setup and run a set of plate curves.
A perfect spice model will then result in spice curves that match the uTracer curves.
Sadly perfect is not going to happen but they should be close and it is useful to understand how far off they may be before the models are used or trusted.
By restricting the data ranges from the utracer used with ExtractModel I finally got a model that was usefully close the the uTracer3 data.
I find ExtractModel strange in that I often have to play around with the data I feed it to get usefully accurate models of beam power pentodes.
Triodes as do most small signal pentodes work fine but the automatic curve matching software seems to have difficulty depending on the data supplied and how much is supplied when used with beam power pentode with a lot of secondary emissions.
More data is not better and can easily result in the software exiting with math error warnings but too little data can result in models with large simulation errors.
Perhaps I just expect far too much from the software.
It was provided as a kind gift from Derk Reefman so I am disinclined to complain about such a useful tool.
As the plate curves for the 6P43P are not a smooth as I may like, it seemed negative feedback will be needed if low distortion is the result. As these are pentodes in order to get a damping factor well above 10 for the control of speaker woofers negative feed back will be required anyway.
The popular Williamson topology where a lot of negative feedback is applied around the output transformer I have always found resulted is disappointing results.
If enough negative feedback is applied (like 20dB or more) around the output transformer the stability that results I find marginal and the transient response is not what I would like. Add in you really have to find a top notch output transformer with low leakage inductance and shunt capacitance to make a Williamson topology work well and the cost of your amplifier can go through the roof.
I decided to add most of the negative feedback locally from the pentode plate directly back to the driving stage. This takes the transformer leakage inductance out of the feedback loop but you still are effected by the transformer shunt capacitance as it will add phase shift to your local negative feedback. I find local negative feedback can result in improved stability and square wave response. This what the ever popular UL operation really is all about, local feedback.
The local feedback method makes life for the driving stage difficult. The driver has to supply extra current for the local feedback network and extra gain to overcome the gain loss the local feedback network causes. The driver has to do both without adding distortion while still producing enough voltage swing to drive the pentode grids.
This is a tall order for the common triodes available.
You can however get there with very high S triodes (S=>15Ma/V) capable of high plate current (Ia>20mA) configured in a cascode stage. There are a few higher priced triodes that will meet the requirements but not a lot.
What I found was a high S, small signal RF pentode operated in triode mode produced a excellent triode for this application for a high gain, low distortion, high current, cascode driver stage.
The bonus it there are lots of RF pentodes to chose from at low cost as they are not very popular today.
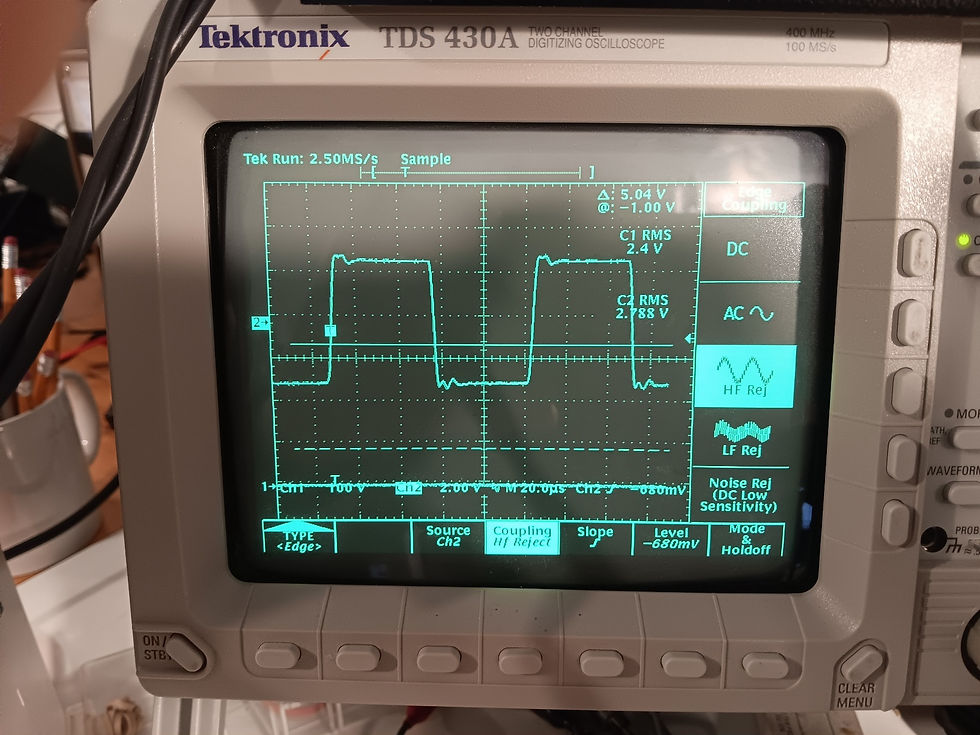
In the proto type of the driver stage, I measured a gain of 48.1dB at a output of 48.7V RMS with a THD of 0.4% with no feedback. The bandwidth went way past 100KHz, the limit I can measure currently.
I was pretty happy with this result as it is plenty to drive the grids of the 6P43P to full output.
For the cascode stage top device I used a BJT instead of a second tube.
Ok you can use a tube and I have done so in the past however it makes for a larger amplifier that will swing a smaller signal from the same B+ and is unlikely to achieve the same high gain or low distortion. As it basically only mirrors current from the lower tube (no voltage gain) it's contribution to the signal path is very small.
The emitter of a BJT used in the top of a cascode stage is a very low impedance point at close to zero ohms like the summing point in a inverting amplifier.
This summing point allows a interesting option of injecting extra current into this summing node of the pentodes plate and the cascode's BJT emitter.
A tube's S (mA/V) is a function of plate voltage and plate current. Drive up the plate current and so S and the gain rises. In a cascode stage with a low impedance summing point gain is controlled solely by the lower tube's S, u is not a significant factor.
This extra injected current allows the driver pentode to be run a higher currents for higher S than the top cascode plate load resistor voltage drop would normally allow.
This extra current is injected without the effective plate load resistor value seen by the pentode being lowered.
The result is a plate load resistor that "looks" to the pentode as a higher value to AC than the lower value to DC. This drives up the gain and lowers the distortion for the same reasons a current source does when used as a plate load.
The output stage for the 6P43P runs in UL mode, push pull loaded with a 5K plate to plate impedance. I used a Antek MP-15W50 transformer. These are low cost and can provide pretty good performance. The power rating I find conservative and can be exceeded without distortion. In this amp I run the 15W rated transformer at about the 20W level.
The 6P43P G1 grid resistor is kept to a lower 150K value to improve bias stability in the presence of some grid leakage current. Taking measures to allow for grid current becomes more important as you push the rating of a power tube.
Operation of the 6P43P in UL mode with the full 330V plate supply on the screens seemed unwise as this is far over the rated 250V for Vg2. It would have also lead to a large increase in the required Vg1 negative bias voltage and so the required driver grid voltage required.
I set the plate voltage at about 330V and the settled on a screen voltage of 275 volts.
The screen is connected to a shunt regulated 275V power supply to improve bias stability and lower distortion. Regulation of the screen voltage also improves the power margins when a tube ratings are pushed as we are doing in this design.
Wait this is a UL design so the screen voltage has to be the same as the plate voltage right?
In this design each screen is fed through a network of two 1K resistors and a 4.7Uf capacitor. The regulated 275V screen voltage connects to one 1K resistor and the other end to the screen. This sets the screen at exactly 275V.
The 4.7uF capacitor then connects to the UL tap on the transformer blocking DC and then to the second 1K resistor that finally then connects to the 6P43P screen. The capacitor couples the UL AC signal to the screen and the second resistor in concert with the first resistor working as a voltage divider allowing the amount of UL screen signal to be tailored for lowest distortion.
The result is you can easily within limits, exactly set a desired screen voltage and UL feedback level. This is not a common design but allows for a lot of output stage design flexibility.
Yes it does add some complexity but my goal was maximum performance from the 6P43P not the simplest amplifier topology. Sorry to those looking for a entry level design.
I also decided to use hybrid bias to further improve the bias stability while not exacting too high a penalty in output power and distortion. Hybrid bias is not a commonly used design as it does add complexity but I like the flexibility it allows in trading bias stability for output power and distortion in the finial design.
In this design I settled on a 250 ohm cathode resistor bypassed by a 1000uF capacitor shared by both 6P43P tubes. The cathode resistor drops about 14.4 volts at idle or about 1/2 the needed negative grid bias for the 6P43P. The remainder of the negative grid bias is provided by fixed bias of -15.3V volts.
The cathode bias resistor improves bias stability as the relative to cathode -Vg1 is increased and Vg2 to cathode is reduced in response to an increase in cathode current.
The 1,000uF capacitor effectively stabilizes the 14.4V cathode voltage for audio signals.
The design includes a separate bias setting pot for each tube to allowing separate adjustment of the bias current in each tube. A 1 ohm cathode resistor in each tube allow the bias level to be matched exactly between the two tubes.
Current matching tends to be more important with toroidal output transformers.
I also matched the output tubes with the design anode voltage of 330V and screen voltage of 275V and cathode current of 29mA for both Vg1 and S (mA/V).
This is important for reaching the lowest THD levels.
I use a uTracer3+ and uTracerJS quick test software for tube matching.
This combination allow very fast and accurate testing and matching of any type of tube.
For higher current power tubes I use a modified uTracer6 again with utracerJS as it has additional calibration features that are in my experience absolutely required with the uTracer6 to achieve accurate results with high current lower voltage tubes.
Below is a PDF of the spice simulation of the design.
Here are the schematics of the amplifier design
At a later date I will add the circuit diagrams for the required regulated power supplies.
Performance measurements are below.

There is no evidence of 6P43P tube distress at full output power such a red plates or glowing screens.


Comments